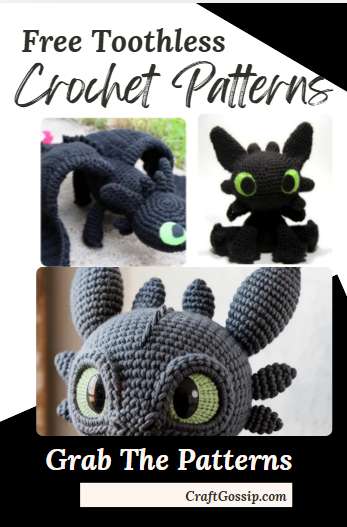
There are certain film characters that seem almost designed to be turned into crochet, and Toothless is surely one of them. Those enormous green eyes, rounded little ears, soft black body and slightly mischievous expression translate beautifully into amigurumi. He might technically be a fearsome Night Fury, but in yarn form he looks far more likely to steal your favourite chair than breathe fire across the living room.
These free Toothless crochet patterns include detailed amigurumi dragons, cuddly chenille versions, tiny keychain-sized projects and step-by-step video tutorials. Some are wonderfully detailed and best suited to confident crocheters, while others simplify the shaping for anyone making their first crochet dragon.
Black yarn can be a little challenging to work with, particularly in the evening when the stitches apparently decide to disappear altogether. Good lighting, a pale-coloured project mat and plenty of stitch markers will make the process much easier. You could also crochet your Night Fury in charcoal, navy or deep purple if you would prefer yarn that is kinder on the eyes.
These are fan-created crochet projects inspired by the much-loved dragon character. Copyright and trademarks relating to How to Train Your Dragon and Toothless belong to their respective owners.
Classic Toothless Amigurumi Pattern
This detailed Toothless amigurumi pattern from Sarselgurumi has been a favourite with crocheters for many years. It includes the distinctive wide head, expressive eyes, wings, tail fins and Toothless’s recognisable red prosthetic tail section. There are quite a few pieces to crochet and assemble, but the finished dragon has plenty of personality.
Photo Tutorial For The Sarselgurumi Toothless Pattern
This visual guide was created to accompany the Sarselgurumi pattern and is extremely useful when you reach the assembly stage. The photographs show the individual pieces, positioning and construction of the finished dragon. Keep both pages open while you work and it will feel rather like having a crafty friend sitting beside you pointing out where each mysterious black piece belongs.
Crochet Toothless With Picture And Video Instructions
This free Instructables project breaks the process into manageable stages and includes plenty of photographs. It was designed to make an otherwise complicated-looking Toothless crochet pattern more approachable, even for adventurous beginners. The combination of written guidance, pictures and video help is particularly handy for shaping the face and attaching the smaller details.
Plush Toothless Amigurumi Pattern
Made with soft chenille-style yarn, this Toothless has a wonderfully squishy, modern plush-toy finish. The legs and body are worked together, while the arms are attached as the body is crocheted, reducing some of the sewing. Using the recommended yarn creates a dragon measuring approximately 21–22 centimetres tall.
Free Night Fury Amigurumi Pattern
This intermediate amigurumi pattern creates a seated black dragon with bright green eyes, wings and a red-tipped tail. I particularly like the upright shape, which makes the finished Toothless easy to display on a shelf or gift as a handmade room decoration. It would look rather marvellous guarding a stack of fantasy novels.
Toothless Amigurumi Free Pattern
This free crochet pattern creates a detailed Toothless-style dragon using traditional amigurumi techniques. The separate limbs, wings, ears and tail allow you to adjust the position and expression as you assemble your dragon. Take your time pinning everything before sewing—the difference between “majestic Night Fury” and “dragon who has had a very long Tuesday” can be just a slightly crooked ear.
Full Toothless Crochet Video Tutorial
Crocheters who prefer watching each step can follow this complete Toothless tutorial from Willow and Wild. The video covers the separate body components as well as assembly, wings and the character’s distinctive tail. Pause it between rounds, keep a notebook nearby and treat it as a relaxed crochet-along rather than trying to keep pace.
Step-By-Step Toothless And Night Fury Crochet Tutorial
This free video series from HappyGurumi begins with the materials and body construction before working through the remaining dragon details. It is a useful choice for visual learners who find shaping easier to understand when they can watch the hook placement. The finished project has the rounded, slightly baby-like proportions that make Toothless so appealing.
Tiny Toothless Amigurumi Crochet Tutorial
Not every Toothless needs to occupy half the sofa. This tiny version is ideal for making a keychain, bag charm, desk companion or small gift for a dragon-loving teenager. Smaller amigurumi can be fiddly, but it is also a lovely way to use leftover black yarn from your stash.
Tips For Crocheting With Black Yarn
The hardest part of making a crochet Toothless is not necessarily the shaping—it is seeing the stitches in black yarn. Work beside a bright window during the day or place a daylight craft lamp directly over your hands. A pale towel or white pillowcase underneath the project will create contrast and make dropped stitches much easier to spot.
Smooth cotton or acrylic yarn generally shows stitch definition more clearly than fluffy black chenille. Chenille produces a cuddly dragon, but it can make counting rounds and finding the correct insertion point more difficult. Place a stitch marker at the beginning of every round and add extra markers around increases, decreases and important shaping points.
For toys intended for children under three, embroidered eyes are safer than plastic safety eyes. You can embroider the green sections using yarn or embroidery thread and add small white highlights to create Toothless’s bright, curious expression.
How To Personalise Your Crochet Toothless
Small details can give each crocheted dragon a completely different personality. Try using emerald, lime or yellow-green felt for the eyes, adding a red tail fin, or brushing a little grey textile paint over the wings to highlight their shape.
You can also adapt many of these free Toothless crochet patterns to make a white Light Fury-inspired dragon. Swap the black yarn for white or pearl grey, soften the ear and horn shapes, and use blue eyes instead of green. Make one of each and you have a rather lovely handmade dragon pair—although you may then receive requests for all three Night Lights, because crochet projects do have a habit of multiplying when you are not looking.
Whether you choose a tiny Toothless keychain or a detailed display-sized Night Fury, these free crochet patterns offer plenty of ways to bring this beloved dragon to life one stitch at a time.
Here is our Free PDF Version of toothless-dragon-crochet-pattern-final
Free Toothless-Inspired Dragon Amigurumi Crochet Pattern
This dragon amigurumi pattern is worked mainly in continuous spiral rounds. Use a stitch marker to mark the first stitch of every round and move it up as you work.
The finished dragon measures approximately 14 cm or 5½ inches tall from the base to the top of the ear when made with worsted-weight yarn and a 3.75 mm crochet hook.
Skill Level
Advanced beginner to intermediate.
You should be comfortable with:
- Magic rings
- Single crochet
- Crochet increases
- Crochet decreases
- Working in continuous rounds
- Working in the back loop only
- Half double crochet
- Basic amigurumi sewing and assembly
Materials
- Approximately one skein of worsted-weight yarn in black or your chosen dragon colour
- 3.75 mm crochet hook
- Polyester toy stuffing
- Locking stitch marker
- Yarn needle
- Pins
- Small sharp scissors
- Fluorescent green craft felt
- Black craft felt
- White craft felt
- Fabric glue suitable for textiles
You can use a slightly smaller crochet hook, around 2.75 mm to 3.25 mm, if you prefer a tighter amigurumi fabric.
Abbreviations
- MR – magic ring
- ch – chain
- sc – single crochet
- inc – work 2 single crochet stitches into the same stitch
- inc 2 – work 3 single crochet stitches into the same stitch
- dec – invisible decrease or single crochet 2 stitches together
- hdc – half double crochet
- BLO – back loop only
- ss – slip stitch
- st/sts – stitch or stitches
The number in parentheses at the end of each round is the stitch count for that round.
Do not join the continuous rounds with a slip stitch unless the instructions specifically tell you to do so.
Body
Round 1: Work 6 sc into a MR. (6)
Round 2: Inc in each stitch around. (12)
Round 3: Work (sc 1, inc) 6 times. (18)
Round 4: Work (sc 2, inc) 6 times. (24)
Round 5: Work (sc 3, inc) 6 times. (30)
Round 6: Work (sc 4, inc) 6 times. (36)
Rounds 7–8: Sc around. (36)
Round 9: Sc 12, dec 6 times, sc 12. (30)
This row creates the wider seated section at the back of the dragon.
Round 10: Sc around. (30)
Round 11: Work (sc 3, dec) 6 times. (24)
Rounds 12–13: Sc around. (24)
Round 14: Work (sc 4, dec) 4 times. (20)
Round 15: Sc around. (20)
Round 16: Work (sc 3, dec) 4 times. (16)
Fasten off. Stuff the body firmly, shaping the wider section into a seated rear.
Head
Round 1: Work 6 sc into a MR. (6)
Round 2: Inc in each stitch around. (12)
Round 3: Work (sc 1, inc) 6 times. (18)
Round 4: Work (sc 2, inc) 6 times. (24)
Round 5: Work (sc 3, inc) 6 times. (30)
Round 6: Work (sc 4, inc) 6 times. (36)
Round 7: Sc around. (36)
Round 8: Work (sc 5, inc) 6 times. (42)
Round 9: Work (sc 6, inc) 6 times. (48)
Rounds 10–11: Sc around. (48)
Round 12: Sc 23, work 3 sc into each of the next 2 stitches, sc 23. (52)
Round 13: Sc around. (52)
Round 14: Sc 25, inc in each of the next 2 stitches, sc 25. (54)
Round 15: Work (sc 7, dec) 6 times. (48)
Round 16: Work (sc 6, dec) 6 times. (42)
Round 17: Work (sc 5, dec) 6 times. (36)
Round 18: Work (sc 4, dec) 6 times. (30)
Round 19: Work (sc 3, dec) 6 times. (24)
Round 20: Work (sc 4, dec) 4 times. (20)
Round 21: Work (sc 3, dec) 4 times. (16)
Round 22: Sc around. (16)
Fasten off, leaving a long tail for sewing.
Stuff the head firmly. Add slightly more stuffing toward the back and sides of the head, while keeping the front of the snout neatly shaped.
The increases in Rounds 12 and 14 create the broader pointed snout. The shape may look unusual before stuffing, but it becomes much more recognisable once the head is firmly filled and shaped.
A useful assembly trick is to slide a knitting needle temporarily through the centre of the head and body. This helps keep both pieces aligned while you sew the neck seam.
Raised Crochet Toe Stitch
The toes are made using a small popcorn-style stitch.
Work 5 hdc into the indicated stitch.
Remove the hook from the working loop and enlarge the loop slightly.
Insert the hook through the first hdc of the group.
Place the working loop back onto the hook and pull it through the first hdc.
The group of five half double crochet stitches will close into one raised toe.
Continue working into the next stitch of the round.
The stitch beside a raised toe can hide underneath it. Gently push the toe aside before counting the stitches in the following round.
Front Legs – Make 2
Round 1: Work 6 sc into a MR. (6)
Round 2: Inc in each stitch around. (12)
Round 3: Work (sc 1, inc) 6 times. (18)
Round 4: Work the ordinary single crochet stitches through the BLO as follows:
Sc 4, make 1 raised toe in the next stitch, work (sc 2, make 1 raised toe in the next stitch) 3 times, sc 4. (18)
This creates four raised toes with two ordinary stitches between each toe.
Round 5: Sc around. Count carefully around the toes. (18)
Round 6: Work (sc 7, dec) twice. (16)
Round 7: Sc around. (16)
Round 8: Work (sc 6, dec) twice. (14)
Round 9: Work (sc 5, dec) twice. (12)
Rounds 10–12: Sc around. (12)
Round 13: Work (sc 4, dec) twice. (10)
Fasten off, leaving a long tail for sewing.
Stuff the lower section of each leg firmly. Use less stuffing near the top so the leg can sit neatly against the body.
Flatten the opening and sew the front legs against the front of the body.
Back Legs – Make 2
Round 1: Work 6 sc into a MR. (6)
Round 2: Inc in each stitch around. (12)
Round 3: Work (sc 1, inc) 6 times. (18)
Round 4: Work the ordinary single crochet stitches through the BLO as follows:
Sc 4, make 1 raised toe in the next stitch, work (sc 2, make 1 raised toe in the next stitch) 3 times, sc 4. (18)
Round 5: Sc around. (18)
Round 6: Work (sc 7, dec) twice. (16)
Round 7: Sc around. (16)
Round 8: Work (sc 6, dec) twice. (14)
Rounds 9–10: Sc around. (14)
Fasten off, leaving a long tail for sewing.
Stuff the lower part of each back leg more firmly than the upper section.
Attach each back leg around its open edge, positioning the legs on either side of the wider seated section of the body.
The back legs should point outward slightly to help the dragon sit steadily.
Ears – Make 2
Round 1: Work 6 sc into a MR. (6)
Round 2: Inc in each stitch around. (12)
Rounds 3–4: Sc around. (12)
Round 5: Work (sc 2, inc) 4 times. (16)
Rounds 6–7: Sc around. (16)
Round 8: Work (sc 3, inc) 4 times. (20)
Rounds 9–14: Sc around. (20)
Round 15: Work (sc 3, dec) 4 times. (16)
Rounds 16–17: Sc around. (16)
Fasten off, leaving a long tail for sewing.
Do not stuff the ears. Flatten them before attaching them to the head.
Mini Horns – Make 6
Round 1: Work 6 sc into a MR. (6)
Round 2: Work (sc 1, inc) 3 times. (9)
Rounds 3–5: Sc around. (9)
Fasten off, leaving a tail for sewing.
Place two horns between the ears on top of the head.
Arrange the remaining four horns down the sides of the head, angling them slightly toward the face.
Pin all six horns before sewing so you can check that the placement looks even from the front and side.
Tail
The tail is worked from the narrow tip toward the body.
Stuff it lightly as you work so it remains flexible enough to curve.
Round 1: Work 4 sc into a MR. (4)
Round 2: Sc around. (4)
Round 3: Inc once, sc 3. (5)
Round 4: Sc around. (5)
Round 5: Inc once, sc 4. (6)
Round 6: Sc around. (6)
Round 7: Inc once, sc 5. (7)
Round 8: Sc around. (7)
Round 9: Inc once, sc 6. (8)
Rounds 10–11: Sc around. (8)
Round 12: Inc once, sc 7. (9)
Round 13: Sc around. (9)
Round 14: Inc once, sc 8. (10)
Round 15: Sc around. (10)
Fasten off, leaving a long tail for sewing.
For a longer tail, repeat the final round several more times before fastening off.
Add the stuffing gradually and bend the tail slightly as you work to create a natural curve.
Tail Fins – Set A
Make 2.
These smaller fins sit near the base of the tail.
Ch 5.
Sc in the 2nd ch from the hook.
Work 3 sc in the next ch.
Ss in the next ch.
Ss in the final ch.
Fasten off, leaving a tail for sewing.
Attach these fins along the centre line near the base of the tail.
Tail Fins – Set B
Make 2.
You can make one fin in black and the other in red for a repaired-tail look, or make both fins in matching colours.
Row 1: Ch 5. Sc in the 2nd ch from the hook, sc in the next 2 ch, inc in the final ch. Ch 1 and turn. (5)
Row 2: Sc in the first 3 stitches, dec over the final 2 stitches. Ch 1 and turn. (4)
Row 3: Sc in the first 2 stitches, work 3 sc in the next stitch, ss in the final stitch.
Work 2 additional slip stitches through the ends of the previous rows. These slip stitches pull the tip into a slight curve.
Fasten off, leaving a tail for sewing.
Attach one fin to each side of the tail tip.
When using one red and one black fin, place the red fin on the left side when the tail is facing you.
Wings – Make 2
Row 1: Ch 6. Sc in the 2nd ch from the hook and the next ch, work 3 sc in the next ch, then sc in each of the final 2 ch. Ch 1 and turn. (7)
Row 2: Sc in the first 3 stitches, work 3 sc in the next stitch, sc in the final 3 stitches. Ch 1 and turn. (9)
Row 3: Sc in the first 4 stitches, work 3 sc in the next stitch, sc in the final 4 stitches. Ch 4 and turn. (11 stitches plus the ch-4 extension)
Row 4: Sc in the 2nd ch from the hook and the next 2 ch, sc in the next 5 stitches, work 3 sc in the next stitch, sc in the next 5 stitches, then work 3 foundation sc. Ch 1 and turn. (19)
Row 5: Sc in the next 9 stitches, work 3 sc in the next stitch, then sc in the final 9 stitches. (21)
Fasten off, leaving a long tail for sewing.
How to Work a Foundation Single Crochet
Ch 2.
Insert the hook into the 2nd ch from the hook.
Yarn over and pull through one loop. You will now have two loops on the hook.
Yarn over and pull through both loops.
For the next foundation sc, insert the hook under the small chain-like loop at the base of the previous stitch.
Yarn over and pull through one loop.
Yarn over again and pull through both loops.
Repeat for the required number of foundation single crochet stitches.
Felt Eyes
Cut two matching eye shapes from fluorescent green felt.
Cut two narrow pupils from black felt.
Cut two tiny highlights from white felt.
Folding the felt in half before cutting can help create matching pairs.
Place the felt pieces onto the face before using glue. Move the eyes around slightly until you are happy with the expression.
Do not glue the eyes in place until all the crocheted parts have been attached.
Use only a small amount of fabric glue so it does not seep around the felt edges.
For a toy intended for a baby or very young child, omit glued felt pieces and embroider the eye details securely instead.
Assembly
Assemble the dragon in the following order.
- Sew the head securely to the body.
- Attach the back legs on either side of the seated rear.
- Flatten and sew the front legs against the front of the body.
- Pin and sew the six mini horns onto the head.
- Flatten and attach the ears, angling them so they frame the face.
- Attach the wings evenly to the back.
- Sew the tail to the lower rear of the body.
- Attach the two smaller tail fins near the base of the tail.
- Attach the two larger fins to the end of the tail.
- Position and glue or embroider the eyes.
Pin every piece before sewing.
Check the dragon from the front, back and both sides before making the final stitches. Small changes in the position of the ears, horns and eyes can make a surprisingly big difference to the finished expression.
Helpful Finishing Tips
Stuff the head using small pieces of filling rather than pushing in one large clump. This helps prevent lumps.
Keep the upper sections of the legs lightly stuffed so they sit neatly against the body.
Count every leg round carefully. Stitches can hide underneath the raised toes.
Use the stitch count in parentheses to check your work at the end of each round.
Take your time when placing the eyes. Moving them only a few millimetres can change the dragon from cheeky to sleepy or slightly grumpy.
The tail should be lightly stuffed so it keeps a gentle curve.
If the dragon tips forward, reposition the back legs slightly farther apart before sewing them permanently.
Colour Ideas
Black yarn creates the most recognisable movie-inspired dragon, but this crochet pattern also works beautifully in other colours.
Try:
- Charcoal grey with amber eyes
- Navy with turquoise eyes
- Purple with lime-green eyes
- Forest green with gold eyes
- White with pale blue wings
- Red and orange for a fire dragon
- Pastel yarn for a nursery dragon
- Galaxy-style variegated yarn for a fantasy dragon
Copyright and Character Disclaimer
This is an unofficial fan-inspired crochet project intended for personal crafting and gifting.
How to Train Your Dragon, Toothless and related names and character designs belong to their respective copyright and trademark owners.
This crochet pattern and the finished handmade project are not official merchandise and are not endorsed, licensed or sponsored by DreamWorks Animation.