**Free One Hour Crochet Slippers Pattern – Quick, Cozy and Perfect for Gifting**
If you’ve ever been halfway through a cold evening and thought, “My toes could really use a blanket of their own,” this is exactly the sort of crochet project to pull out.
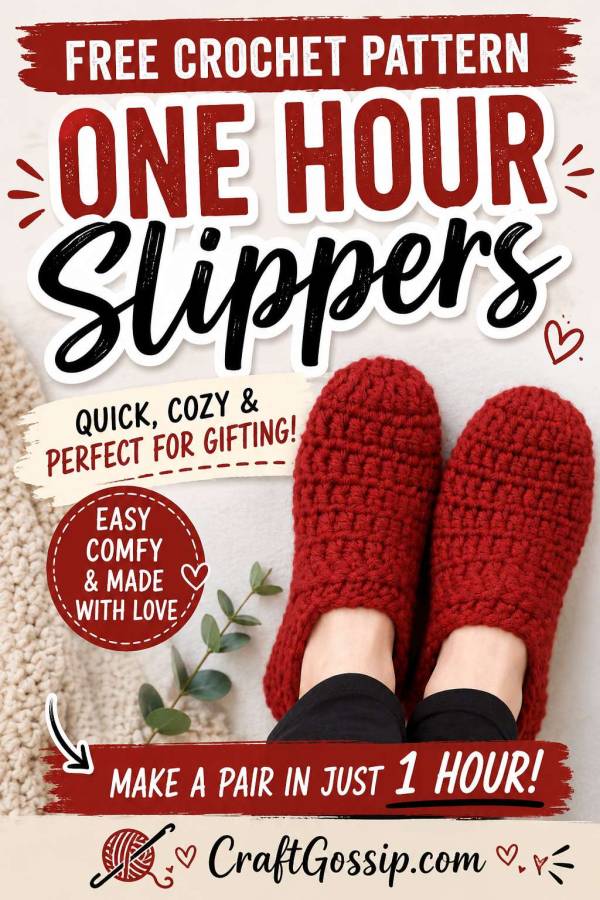
These chunky crochet slippers work up surprisingly quickly, and once you have made the first pair, they are the sort of pattern you can come back to again and again. Use a solid colour for something simple and classic, or grab one of those variegated yarns from the stash that looked irresistible in the shop but has been waiting patiently for the right project.
Bulky yarn is really the secret here. Fewer stitches, fast-growing rounds and a thick, cozy fabric make these slippers wonderfully satisfying to crochet. They are worked from the toe towards the heel, mostly in joined rounds, before switching to rows to shape the back. A simple scalloped edging finishes them off.
They are also brilliant for last-minute handmade gifts. Keep a couple of balls of chunky yarn tucked away and you can make a pair for Christmas, birthdays, care packages or those occasions that somehow sneak up on us every single year.
This is a good project for a confident beginner who is comfortable with double crochet, simple decreases and working in the round.
**Materials**
– 5 mm H/8 crochet hook
– Category 5 bulky or chunky yarn
– Approximately 100 to 120 yards per pair, depending on yarn and tension
– Sample yarn: Cascade Yarns Pacific Chunky or similar
– Yarn needle
– Scissors
– Stitch marker, optional
**Gauge**
Approximately 7 double crochet stitches x 4 rows = 2 inches.
**Finished Size**
Approximately 9.5 inches long as written.
Because feet come in all sorts of shapes and sizes, check the fit before beginning the heel. Instructions for adjusting the length are included below.
**Crochet Abbreviations**
ch = chain
dc = double crochet
dc2tog = double crochet 2 stitches together
sl st = slip stitch
st/sts = stitch/stitches
sk = skip
US crochet terminology is used throughout.
**Pattern Notes**
The beginning chain 2 does not count as a stitch.
At the end of each joined round, slip stitch into the first actual double crochet rather than the beginning chain.
The slipper begins at the toe and is worked towards the heel.
The toe and foot are crocheted in joined rounds.
The heel is worked back and forth in rows.
When you begin the heel section, 7 stitches are left unworked. These form the front section of the slipper opening.
**Pattern Instructions**
**Foundation**
Ch 2.
**Round 1:** Work 10 dc into the first chain made. Join with a sl st to the first dc.
10 sts.
**Round 2:** Ch 2. Work 2 dc into each stitch around. Join to the first dc.
20 sts.
**Round 3:** Ch 2. *Dc in the next 3 sts, 2 dc in the next st.* Repeat from * to * around. Join to the first dc.
25 sts.
You should now have a small rounded crochet toe.
**Rounds 4 to 11:** Ch 2. Dc in each stitch around. Join to the first dc.
25 sts.
At this stage your work should look like a soft crochet tube with a rounded toe.
Before moving on to the heel, this is the best place to check the length. If possible, slip the crochet section over the intended foot.
**Heel Opening**
You will now stop crocheting around all 25 stitches and begin working back and forth over 18 stitches.
**Row 12:** Ch 2. Dc in the next 18 sts. Leave the remaining 7 sts unworked.
18 sts.
**Rows 13 to 15:** Ch 2, turn. Dc across.
18 sts.
**Shape the Heel**
**Row 16:** Ch 2, turn. Dc in the next 5 sts, dc2tog 4 times, dc in the final 5 sts.
14 sts.
**Row 17:** Ch 2, turn. Dc in the next 3 sts, dc2tog 4 times, dc in the final 3 sts.
10 sts.
**Position for the Edging**
Turn your work.
Sl st into the first stitch of Row 17.
This simply moves your working yarn into position for crocheting around the slipper opening. You are not working another full heel row.
**Crochet Around the Slipper Opening**
You will now work around the entire opening.
There are 6 row ends down one side of the heel, 7 previously unworked stitches across the front of the opening, and 6 row ends up the opposite side.
**Round 19:** Ch 2.
Work 2 dc into each of the 6 row ends along the first side.
12 dc.
Work 1 dc into each of the 7 previously unworked stitches across the front opening.
7 dc.
Work 2 dc into each of the 6 row ends along the opposite side.
12 dc.
Join with a sl st to the first dc.
31 sts total.
**Scalloped Edging**
**Round 20:** Ch 1.
*Sk 2 sts, work 5 dc into the next st, sk 2 sts, sl st into the next st.*
Repeat this sequence 5 times around the opening.
Sl st neatly into the remaining stitch and fasten off, leaving a long yarn tail for sewing.
The edging should sit comfortably around the opening without pulling or puckering.
**Sew the Heel**
Bring the heel edges together neatly.
Thread the long yarn tail onto a yarn needle and whipstitch the heel seam securely closed.
Do not pull the seam so tightly that the crochet puckers.
Fasten securely and weave in the ends.
Repeat the pattern for the second slipper.
**How to Adjust the Slipper Length**
The slipper is worked from the toe towards the heel, so you do not change the size by adding stitches to the starting chain.
Instead, adjust the length during the plain foot rounds before beginning Row 12.
At the stated gauge, each additional round adds approximately 1/2 inch to the length.
For a slipper approximately 1/2 inch shorter, work one fewer plain round.
For the pattern size, work Rounds 4 to 11 as written.
For approximately 1/2 inch extra length, add one extra round of 25 dc before beginning Row 12.
For approximately 1 inch extra length, add two extra rounds.
Keep the stitch count at 25 during any additional rounds.
This is much more reliable than trying to assign exact shoe sizes because yarn stretch, foot width and individual crochet tension can make quite a difference to the finished fit.
**Adjusting the Width**
The 25 stitches established in Round 3 determine the basic width of the slipper.
For a slightly narrower fit, try going down one hook size while maintaining a comfortable fabric.
For a little more room, a slightly larger hook may be enough.
For significantly wider or narrower feet, the pattern would need to be properly regraded because changing the circumference also changes the heel and edging stitch counts.
Simply adding a few random stitches is likely to throw out the heel shaping.
**A Quick Fit Check**
Before starting Row 12, try the slipper over the intended foot if you can.
The foot section should feel comfortably snug rather than loose and floppy.
Remember that crochet fabric often relaxes slightly with wear.
If it is too short, add another plain round.
If it is too long, remove a round before beginning the heel.
**Yarn Tips**
A smooth bulky yarn works beautifully for these slippers because it gives you good stitch definition while still producing a thick, warm fabric.
Soft acrylic and washable wool blends are both practical choices, especially if you are making the slippers as gifts.
You can also experiment with two strands of worsted-weight yarn held together, but check your gauge first. Two strands do not automatically behave exactly like a Category 5 yarn, and the finished fit may change.
**Making Crochet Slippers Less Slippery**
Crochet slippers can be slippery on polished timber, vinyl and tile floors.
For extra grip, add dots or lines of a suitable non-slip fabric product to the soles after the slippers are finished, following the manufacturer’s directions and allowing it to dry completely before wearing.
You can also sew suitable non-slip sole fabric to the bottom if you want something more substantial.
**A Quick Handmade Gift Idea**
These slippers would be lovely tucked into a gift basket with a mug, hot chocolate, tea, hand cream or a favourite book.
And because they work up so quickly, they are particularly useful for those moments when you suddenly remember you promised someone a handmade Christmas present.
Not that any of us have ever done that.
Once you understand the construction, this is one of those patterns that is very easy to make again in different yarns and colours for family, friends and gift baskets.