
The You Got This Afghan is a medium-weight yarn crochet design with an intermediate level of complexity and another fun pattern from Lionbrands new range of fun and funky styling. I love the graphics they use in the photos.
Patterns, projects and techniques
The You Got This Afghan is a medium-weight yarn crochet design with an intermediate level of complexity and another fun pattern from Lionbrands new range of fun and funky styling. I love the graphics they use in the photos.
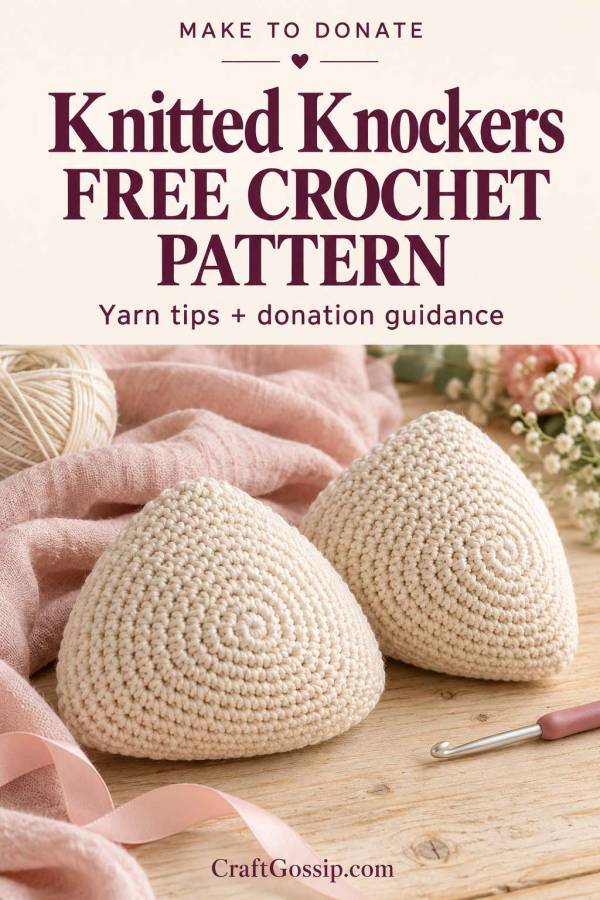
If you have been searching for a Knitted Knockers crochet pattern, you might be wondering whether you have landed in the wrong craft category. Despite the name, there is an official crochet version, so you can put your hooks to good use without picking up knitting needles.
I love sharing projects that give our crafting a practical purpose. Sometimes a few carefully chosen supplies and an evening of stitching can become something very personal for someone else. This is one of those projects where following the organisation’s instructions matters far more than adding our own creative flourishes.
Knitted Knockers are soft, lightweight breast forms made by volunteers for people who have undergone breast surgery. The organisation connects makers with recipients and provides its breast forms free of charge.
Both knitted and crocheted versions are available. For makers, the important starting point is choosing the correct pattern and materials for the organisation receiving your donation.
Visit the official Knitted Knockers pattern and tutorial page and look for “Knitted Knockers Crochet Pattern,” revised June 10, 2023, version 8.
The pattern is credited to Claudia Barbo, with that revision by Michelle Peruskie. It includes sizes A, B, C, D and DD.
Download the written instructions before starting and use the accompanying crochet video for extra help. The organisation advises following the written pattern if the video differs, because instructions are updated periodically.
This project uses a magic ring, single crochet, increases, invisible decreases and working in a continuous spiral.
I would suggest being comfortable counting stitches and following shaping instructions before making your first donation pair. Stitch markers are particularly useful here. “I’ll remember where that round started” has led plenty of us into unnecessary unravelling.
The pattern uses US crochet terminology. Its single crochet stitch is called double crochet in UK terminology, which is worth noting for Australian and British readers.
Follow the pattern’s gauge, shaping and sizing directions rather than substituting instructions from a generic crochet bra cup.
This is a project where I would check the yarn requirements before opening the stash cupboard.
KnittedKnockers.org maintains a tested, approved yarn list and identifies options suitable for crochet. Crochet can produce a firmer fabric than knitting, so a yarn approved for a knitted version is not automatically the right choice for the crocheted one.
Check the current list through the official pattern page before buying supplies. Donations distributed through KnittedKnockers.org must use its approved yarns and patterns.
A soft-looking ball band or a “baby yarn” label is not enough on its own. Choose the exact yarn and weight specified by your receiving organisation.
Ask your chosen organisation what sizes and colours it currently needs, whether it accepts crocheted breast forms, and how it wants them finished and delivered.
For the official crochet pattern:
That adjustable opening is intentional, so resist the temptation to sew everything neatly shut. Follow the finishing directions carefully.
Australian readers can also explore the free crocheted knockers pattern offered by Be Uplifted in Brisbane.
Its page includes a pattern-request option for making crocheted temporary breast prostheses. Contact the charity directly about its current materials and donation requirements before starting.
Keep each organisation’s instructions together. Mixing one group’s pattern with another group’s materials list can create avoidable confusion.
If your craft group would like several projects to choose from, our crochet chemo cap patterns offer another way to make thoughtful donations. For a wider selection, browse our crochet patterns to make and donate to charity.
Choose a project the receiving group actually needs, check its requirements, and make one carefully before planning a whole basketful.
There is something lovely about using a familiar skill to offer a little practical kindness. Start with the official crochet pattern, take your time with that first pair, and let usefulness guide the stitches.
This simple crochet breast form uses a gently rounded front and a flat back, joined with an opening so the filling can be adjusted.
Unlike the triangular official Knitted Knockers design, this version has a circular outline. It is a starting point for experimenting with shape and fit, rather than a standardised cup-size pattern.
Important: This original pattern has not been physically tested or approved by Knitted Knockers. Do not use it for donations requiring an approved pattern. Anyone considering wearing it following breast surgery should first ask their breast-care nurse or treating team whether the materials, seams and design are suitable.
These materials are suggestions for this original design. They are not a substitute for a charity’s approved materials list.
Aim for approximately 24 single crochet stitches and 26 rows per 10 cm, measured on a flat single crochet sample.
Your stitches should form a flexible fabric without large gaps. If the fabric feels stiff, reconsider the yarn and hook combination before making the full piece.
At this tension, the finished form is expected to measure approximately 10–12 cm across, depending on filling and individual tension. This is an estimate, not a tested measurement or a bra cup-size designation.
This pattern uses US crochet terminology.
In UK terminology, the US single crochet stitch is called double crochet.
Round 1: Work 6 sc into a magic ring. Pull the ring closed. 6 sts
Round 2: Inc in every stitch around. 12 sts
Round 3: [Sc in next st, inc in next st] 6 times. 18 sts
Round 4: [Sc in next 2 sts, inc in next st] 6 times. 24 sts
Round 5: [Sc in next 3 sts, inc in next st] 6 times. 30 sts
Round 6: [Sc in next 4 sts, inc in next st] 6 times. 36 sts
Round 7: [Sc in next 5 sts, inc in next st] 6 times. 42 sts
Round 8: [Sc in next 6 sts, inc in next st] 6 times. 48 sts
Round 9: [Sc in next 7 sts, inc in next st] 6 times. 54 sts
Round 10: [Sc in next 8 sts, inc in next st] 6 times. 60 sts
Round 11: [Sc in next 9 sts, inc in next st] 6 times. 66 sts
Round 12: [Sc in next 10 sts, inc in next st] 6 times. 72 sts
Round 13: [Sc in next 11 sts, inc in next st] 6 times. 78 sts
Round 14: [Sc in next 12 sts, inc in next st] 6 times. 84 sts
Before continuing, check the fabric. It should be broadly flat, although the repeated increase positions may give it a slightly hexagonal outline. Pronounced ruffling or cupping at this stage suggests that your tension needs adjusting.
Rounds 15–17: Sc in every stitch around. 84 sts in each round
These three rounds add depth to the front.
Sl st into the next stitch to soften the finishing step. Fasten off and weave in the end. The slip stitch does not count as an additional stitch.
Secure the starting tail carefully on the wrong side.
Work Rounds 1–14 of the front instructions.
You will finish with 84 stitches.
Do not work the three additional rounds used for the front.
Sl st into the next stitch. Fasten off, leaving approximately 100 cm of yarn for joining. Secure the starting tail.
Place the pieces together with their wrong sides facing inward. The extra rounds on the front should create space for the filling.
Align the edges so that each front stitch matches one back stitch. Locking markers placed at intervals can help prevent the pieces from shifting.
Using the long tail and a blunt yarn needle, whipstitch through the outermost loop of each corresponding stitch pair.
Join 72 stitch pairs, leaving 12 stitch pairs unjoined for the filling opening.
Keep the seam relaxed. Pulling it tight will gather the edge and distort the shape.
Secure the joining yarn firmly at the end of the seam and weave it into the inside of the work. Leave the opening accessible.
Add small amounts of fibre filling through the opening.
Spread it evenly beneath the front panel, gently shaping the piece with your hands. Aim for a softly rounded front and a comparatively flat back.
Avoid packing it into a firm ball. More filling is not automatically a better fit.
The front should remain compressible, and the filling should stay inside without pushing through gaps in the crochet fabric.
Cut a separate length of yarn approximately 40 cm long.
Starting at one end of the opening, lace the yarn loosely between the corresponding front and back stitches across all 12 unjoined stitch pairs, as though lacing a shoe.
Leave a tail at each end.
Gently draw the edges together without gathering them tightly. Tie a loose bow and tuck the bow and tails inside the opening.
This allows the lacing to be loosened when filling needs to be added or removed. Check that the opening stays closed during handling and that the fastening does not create an uncomfortable lump.
Before considering this prototype for personal wear, check:
For use following surgery, have the design and fit checked by the wearer’s breast-care professional. Do not place this untested design against an incision or healing skin.
Please use the receiving organisation’s approved pattern and materials instead of this experimental design.
The official Knitted Knockers crochet pattern and tutorials are the appropriate starting point for donations to KnittedKnockers.org. Following the organisation’s requirements helps volunteers sort and distribute donations that meet recipients’ needs.