• Home
  • Suggest A DIY
  • DIY Newsletter

Crochet

Patterns, projects and techniques

  • About CraftGossip
  • Our Network
    • Bath & Body Crafts
    • Candle Making Ideas
    • Crochet Ideas
    • Cross Stitch
    • Edible Crafts
    • Felting Patterns
    • Glass Art
    • Home & Garden Ideas
    • Indie Crafts
    • Jewelry Making
    • Kids Crafts
    • Knitting Patterns
    • Lesson Plans
    • Needlework
    • Party Ideas
    • Polymer Clay
    • Quilting Ideas
    • Recycled Crafts
    • Scrapbooking
    • Sewing Patterns
    • Card Making
    • DIY Weddings
    • Not Craft Ideas
  • Giveaways
  • Roundups
  • Store
  • Search

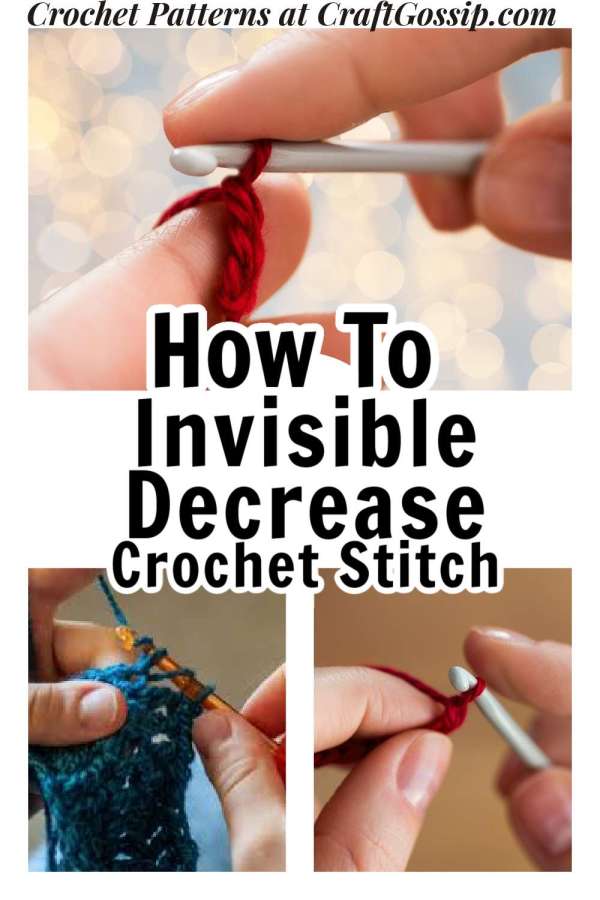
How to Do Invisible Decrease In Crochet Stitches

July 25, 2024 by Shellie Wilson

Mastering the Invisible Decrease in Crochet: A Roundup of Tutorials

Hey there, fellow crocheters! If you’ve been diving into the world of amigurumi or just looking to refine your crochet techniques, you’ve probably heard of the invisible decrease stitch. This nifty technique is a game-changer for creating seamless decreases, especially in projects where you want your stitches to look as smooth as possible. Today, I’ve gathered a selection of fantastic tutorials to help you master the invisible decrease stitch. Let’s get started!

Tutorial Roundup

  1. Invisible Increase and Invisible Decrease Crochet Techniques by Tiny Curl
    This comprehensive guide covers both invisible increases and decreases, perfect for enhancing your amigurumi projects.
    Read more 
  2. Invisible Decrease Crochet Stitch Tutorial by Vami Creations
    Vami Creations offers a detailed tutorial on the invisible decrease stitch, making it easy to follow along and perfect your technique.
    Read more 
  3. The Invisible Decrease by All About Ami
    This tutorial by All About Ami dives into the specifics of the invisible decrease, with clear instructions and helpful photos.
    Read more 
  4. Invisible Decrease Crochet Free Tutorial (+ Video) by Zamiguz
    Zamiguz provides a free tutorial along with a video to guide you through the invisible decrease, great for visual learners.
    Read more 
  5. Normal & Invisible Decreases: How to Work & When to Use Them by A Purpose and a Stitch
    This tutorial not only explains how to do the invisible decrease but also when to use it versus a normal decrease.
    Read more 

Differences and Uses

The main difference between a normal decrease and an invisible decrease lies in the technique and the final appearance. A normal decrease typically involves crocheting two stitches together, which can create a noticeable bump or gap in your work. The invisible decrease, on the other hand, involves working only through the front loops of the stitches, creating a much smoother and less noticeable decrease.

This technique is particularly useful in amigurumi projects, where smooth and seamless decreases are crucial for achieving a polished look. It’s also beneficial in any project where you want your decreases to blend in more naturally with the surrounding stitches.

My Tips for Invisible Decrease Stitches

  1. Use a smaller hook: Sometimes, using a slightly smaller hook than recommended for your yarn can help create tighter, cleaner stitches.
  2. Keep tension even: Maintaining even tension throughout your work ensures that your decreases stay consistent and invisible.
  3. Practice on scrap yarn: Before diving into your main project, practice the invisible decrease on some scrap yarn to get the hang of it.
  4. Use good lighting: It’s easier to see and work through the front loops of your stitches when you have good lighting.

Happy crocheting, and may your invisible decreases be flawless!
«
»

Have you read?

Free Crochet Pattern – Wind Spinner

There is something wonderfully cheerful about a crochet project that uses up scraps, works up quickly, and then actually does something once it is finished. This free crochet wind spinner pattern from CraftBits is exactly that kind of make — bright, simple, stash-friendly, and perfect for adding a little handmade movement to your garden, porch, balcony, or craft room window.

The pattern uses 8 ply yarn, a 3.5 mm crochet hook, and just a few basic supplies, making it a lovely beginner-friendly crochet project for anyone who is comfortable with chaining and working simple stitches. The clever part is that the spiral shape forms naturally as the stitch count increases, so you are not doing anything complicated to create that lovely corkscrew twist. It is one of those satisfying “oh, that’s clever!” crochet projects that looks much more impressive than the effort involved.

I especially like that this project is flexible. You can make it with two, three, or four colours, depending on what is sitting in your yarn basket giving you the guilt stare. Bright rainbow colours would be gorgeous for a summer patio, while softer blues and greens would make a lovely coastal-style wind spinner. You could even make red, white, and green versions for Christmas, or orange, purple, and black for Halloween if you like your garden décor with a bit of seasonal drama.

The CraftBits pattern also suggests adding beads, tassels, pom-poms, charms, or another small hanging weight to the bottom, which is a nice practical touch. That little bit of weight helps the spinner hang properly and gives it more movement when the breeze catches it. If you are making this for outdoor use, I would choose acrylic yarn or another easy-care yarn that can cope with a bit of weather. Cotton would give a crisper look, but it may hold moisture longer if it gets rained on.

This is also a great project for group crafting, charity stalls, school holiday crafting with older kids, or quick handmade gifts. Once you have made one, it would be very easy to make a whole batch in different colour combinations. And we all know how dangerous “just one more” projects can be when there is leftover yarn involved.

For beginners, the only thing I would watch is the length of the starting chain. A longer chain gives you a longer wind spinner, but it also means many more stitches by the final row. Start with a manageable length for your first one so you can enjoy the process rather than wondering why your relaxing crochet project has suddenly turned into a yarn-eating marathon.

If you are looking for an easy scrap yarn crochet project, a quick garden crochet idea, or a beginner-friendly crochet decoration that feels fun and useful, this free crochet wind spinner pattern is well worth bookmarking. It is cheerful, inexpensive, and gives leftover yarn a second life — which is always a win in my craft room.

You can find the free pattern on CraftBits here: Free Crochet Pattern – Wind Spinner

This free crochet wind spinner pattern is a cheerful scrap yarn project that works up quickly and adds handmade colour to your garden, porch, balcony, or window.

This easy crochet wind spinner is made with 8 ply yarn and a 3.5 mm crochet hook. The spiral shape forms naturally through simple stitch increases, making it a beginner-friendly crochet project with lots of room for colour play. Add beads, tassels, charms, or pom-poms for extra weight and movement.

The CraftBits article is already targeting strong phrases such as “free crochet pattern,” “wind spinner,” “scrap yarn crochet project,” and “beginner-friendly crochet project.” To improve SEO further, I would add a few extra search-friendly phrases naturally into the post, such as “crochet garden decoration,” “easy crochet wind spinner for beginners,” “crochet patio décor,” and “quick crochet gift idea.”

Affiliate opportunities fit naturally here for 8 ply yarn, acrylic yarn bundles, crochet hooks, stitch markers, yarn needles, tassel makers, beads, and outdoor-safe hanging supplies. Mary Maxim, Amazon, and Etsy would all be suitable if linked gently inside the article body rather than as a hard-selling supply list.


More Articles

Afghans, Blankets & Throws amigurumi Baby Hat Baby Patterns bags Beanies Beginner Book Reviews Christmas CHRISTMAS Clothing Crochet Patterns Crochet Techniques & Ideas Free Crochet Patterns Granny Squares Halloween Patterns Quick Scarfs shawls

RSS More Articles

  • Digital Scrapbooking Is Back: 12 Apps for Creating Scrapbook Pages on Your iPad
  • Learn about Your Local Birds
  • Knit Yourself Some Pockets
  • Marking Tools That Won’t Bleed or Ghost on Fabric (A Hobby Quilter’s Guide)
  • Free Crochet Pattern – Wind Spinner
  • How To Make Granola: 10 Easy Homemade Granola Recipes
  • 15 Handmade Halloween Mantel Decorations To Make This Year
  • 12 Scrapbook Layout Ideas with a Single Photo
  • Wet Felted Scarf Tutorial by Natasha Smart Textiles
  • How To Sew a Throw Pillow

Pick Your Blog

  • Sewing
  • Knitting
  • Quilting
  • Crochet
  • Home & Garden
  • Recycled Crafts
  • Scrapbooking
  • Card Making
  • Polymer Clay
  • Cross-Stitch
  • Edible Crafts
  • Felting
  • Glass Art
  • Indie Crafts
  • Kids Crafts
  • Jewelry Making
  • Lesson Plans
  • Needlework
  • Bath & Body
  • Party Ideas
  • Candle Making
  • DIY Weddings
  • Not Craft
  • Free Craft Projects

Copyright © 2026 · CraftGossip | Start Here | Contact Us | Link to Us | Your Editors | Privacy and affiliate policy