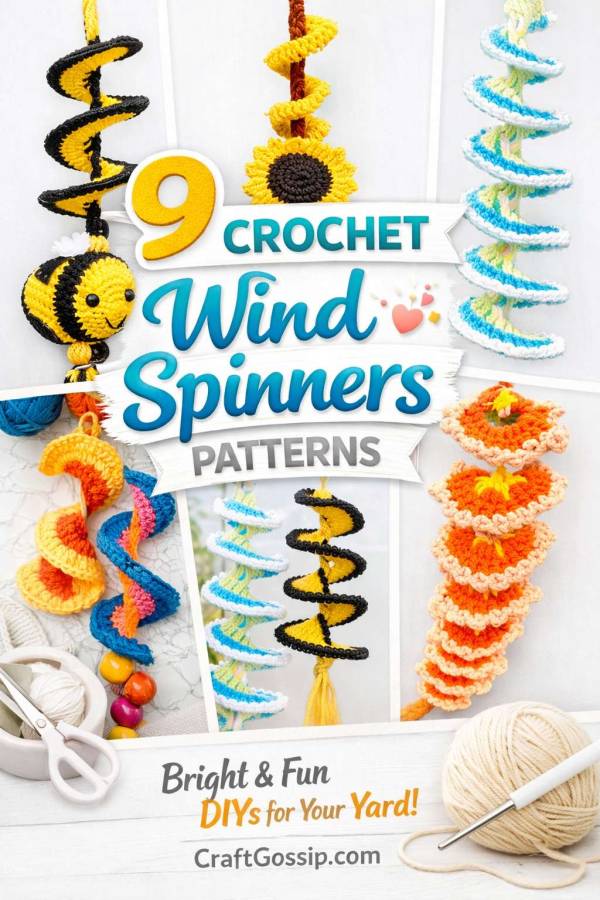
There’s something a bit addictive about crochet wind spinners. You make one thinking it will be a quick little scrap-yarn project for the patio, and suddenly you’re eyeing every leftover ball of yarn in the basket and wondering whether the fence needs a rainbow version too. They’re cheerful, fast, surprisingly satisfying, and one of those crochet projects that looks far fancier spinning in the breeze than the effort it takes to make them.
If you’ve been looking for a crochet wind spinner pattern, a scrap yarn crochet project, or an easy bit of crochet garden decor, this is a fun rabbit hole to fall into. I’ve pulled together a mix of internal and external links, including written patterns, video tutorials, and a waterproof option for outdoor use. I also live-checked the links so you’re not clicking through to dead ends, which is always a little crafting heartbreak of its own.
Why crochet wind spinners are such a good stash-busting project
The reason these are taking off is simple: they’re easy to personalise. You can make them long and dramatic, short and chunky, soft and frilly, or bright enough to make the backyard look like it’s hosting a yarn festival. Most versions use simple crochet stitches and clever increases to create that twisty spiral shape, so they’re very beginner-friendly while still feeling a bit magical when they hang up properly.
They’re also perfect for using up leftovers. A bit of DK here, some worsted there, maybe a tassel from the ends basket you’ve been pretending not to notice. And if you want something more weather-friendly, CrochetGossip’s waterproof jelly yarn version is a clever twist for anyone wanting true outdoor crochet decor rather than something that needs to be brought in every time the weather turns.
A quick how-to before you dive into the links
Most crochet wind spinners begin with a foundation chain or foundation single crochet row, then build out with increasing stitches to create the curl. Samelia’s Mum uses regular 8 ply yarn and a 3.5 mm hook and notes that leaving longer tails at both ends makes it easier when you decide how you want to hang the finished spinner. That’s a small tip, but honestly one of those practical little details that saves annoyance later.
A few other tutorials vary the shaping slightly. Knit & Crochet Blog mentions using a lighter third row approach to keep the spinner airy while still getting the same visual corkscrew effect, and some patterns add beads, tassels, flowers, or themed embellishments for extra movement and personality.
1. Crochet Pattern – Waterproof Wind Spinner
This is the best internal pick if you want a crochet wind spinner that can genuinely handle outdoor display a little better. It uses jelly yarn for a sturdier, weather-aware version, which makes it a smart option for porches, fences, pergolas, or anywhere regular yarn might end up looking a bit tired too quickly.
2. How I Made a Crochet Wind Spinner – Samelia’s Mum
This is such a lovely, approachable version and still one of the most useful starting points if you like a written explanation with that “I actually made this and here’s what worked” feel. It’s simple, practical, and ideal if you want a basic crochet wind spinner pattern using standard yarn without overcomplicating the project.
3. Easy Crochet Wind Spinner Tutorial! Make Them in Under ONE…
https://www.youtube.com/watch?v=gLvfLKj1gdk
This is the one you just shared, and it’s a great inclusion for visual learners. If you prefer watching the shaping happen row by row instead of reading through stitch instructions, this kind of tutorial can make the whole project click much faster.
4. EASY Crochet Wind Spinner Tutorial Scrap Yarn Project!
https://www.youtube.com/watch?v=Dl-lxq0PpW4
Another handy video-based option, especially if your goal is to burn through scrap yarn without overthinking colour planning. This one feels like the sort of project you can make in a crafty afternoon with tea nearby and a growing pile of “just one more” spirals beside you.
5. Crochet Wind Spinner – Free Pattern – Little Treasures
This one is a nice blog-style free pattern with a weekend-project feel to it. I like it for readers who enjoy written patterns but still want something beginner-friendly and not too formal or intimidating.
6. How to Crochet a Wind Spinner – Knit & Crochet Blog
This is a particularly useful tutorial because it explains the shaping logic well and includes both a written pattern and video support. It’s a strong choice if you want to understand not just what to do, but why the spiral forms the way it does.
7. Crochet Wind Spinner Pattern by Maxine Gill
This one is worth a look if you want something a touch different from the standard basic versions. It combines Tunisian and standard crochet stitches, so it leans a bit more adventurous while still staying decorative and giftable.
8. Windspinner Pattern by LisaAuch Crochet
A nice adaptable pattern if you want to play with colour themes and personalise the final look. This feels like the version for crocheters who make one design and immediately start thinking, “Right, now I need a bee one, a Christmas one, and possibly one for the mailbox.”
9. Sunflower Wind Spinner
If you want your crochet wind spinner to feel a bit more decorative and themed, this sunflower version is a lovely step up. It still keeps the fun spiral motion, but adds a floral finish that would look beautiful in a garden corner or sunny window.
My take on what makes the best crochet wind spinner
For absolute beginners, I’d start with Samelia’s Mum or one of the YouTube tutorials. They keep the project feeling approachable, and that matters with a design like this because once you understand the shaping, you can freestyle endlessly.
For something sturdier and more outdoor-friendly, the CrochetGossip waterproof wind spinner is the smartest internal link in the bunch. And for crocheters who want to move past the plain spiral into something more decorative, the sunflower and other embellished Ravelry versions are where things get especially fun.
A few easy styling ideas for finished wind spinners
Once you’ve made the base spinner, it’s easy to dress it up. Add beads for weight and sparkle, tassels for more movement, or little crochet flowers and themed toppers if you want a seasonal version. I’d also say don’t underestimate how pretty a grouped display can look. Three spinners in slightly different lengths and colours always looks more intentional than one lonely spiral doing its best near the potting bench.
If you love quick decorative crochet, you could naturally tie this post into other CrochetGossip home and garden-style projects too, especially pieces that bring colour and texture to outdoor spaces.
Easy Crochet Wind Spinner Pattern
This crochet wind spinner is a lovely little stash-busting project you can make in an afternoon. It uses simple stitches, a long starting chain, and a few rows of increases to create that pretty corkscrew twist. Hang one in the garden, on the patio, or near a sunny window, and add a tassel or beads at the bottom for extra movement.
Materials
- 8 ply yarn in 2 to 4 colors
- 3.5 mm crochet hook
- Scissors
- Yarn needle
- Optional: beads, tassel, pom-pom, or other hanging weight
Finished Look
A long spiraled wind spinner with a soft corkscrew shape. The more color changes you use, the more dramatic the twist looks.
Notes
- Leave a long tail at the beginning and end for hanging.
- Do not turn at the end of rows.
- Fasten off after each row.
- Rejoin yarn at the beginning of the next row.
- The spiral forms naturally as the stitch count increases.
Abbreviations
- ch = chain
- sc = single crochet
- dc = double crochet
- st = stitch
- rep = repeat
Pattern
Foundation
Ch 75, leaving a long starting tail. Fasten off.
Tip: Tie a small knot in the starting tail so you can easily identify the top end later.
Row 1
Join yarn in the first chain.
Work 1 sc in each chain across.
Fasten off.
Row 2
Join yarn at the beginning of the row.
Work 2 dc into each stitch across.
Fasten off.
Row 3
Join yarn at the beginning again.
Work 3 dc into each stitch across.
Fasten off.
Row 4
Join yarn at the beginning once more.
Work 1 sc in each stitch across.
Fasten off, leaving a long tail.
Finishing
Use a yarn needle to weave in the loose tails from the middle rows. Leave the first and last long tails in place.
Gently arrange the strip into an even spiral or corkscrew shape. One end will be used for hanging, and the other end can hold a weight.
Add one of the following to the bottom tail:
- tassel
- wooden beads
- pom-pom
- small crocheted motif
- decorative charm
This little weight helps the spinner hang nicely and move well in the breeze.
Color Ideas
This pattern looks especially pretty in stripes. Try:
- white, yellow, green, blue
- rainbow scraps
- sunflower shades
- beachy blues and aqua
- Christmas red, white, and green
Handy Tip
If you want a longer spinner, simply begin with a longer chain. If you want a fuller twist, use thicker yarn or experiment with an extra increase row.