• Home
  • Suggest A DIY
  • DIY Newsletter

Crochet

Patterns, projects and techniques

  • About CraftGossip
  • Our Network
    • Bath & Body Crafts
    • Candle Making Ideas
    • Crochet Ideas
    • Cross Stitch
    • Edible Crafts
    • Felting Patterns
    • Glass Art
    • Home & Garden Ideas
    • Indie Crafts
    • Jewelry Making
    • Kids Crafts
    • Knitting Patterns
    • Lesson Plans
    • Needlework
    • Party Ideas
    • Polymer Clay
    • Quilting Ideas
    • Recycled Crafts
    • Scrapbooking
    • Sewing Patterns
    • Card Making
    • DIY Weddings
    • Not Craft Ideas
  • Giveaways
  • Roundups
  • Store
  • Search

Flower Making

May 8, 2013 by jd wolfe

crochet flower tutorial

http://tenceremiz.blogspot.com/2013/02/tigla-cicek-yapimi.html


I have no idea what language this tutorial is written in, but you’ll have no trouble following along with the detailed photos.  I like the way she creates these pretty flowers.  Is there such a thing as too many flowers?  You can use them to embellish a bag like this one!

New Link to English Version!

PS – tiny update.  Thanks to the readers who have identified the language of the blog as Turkish.  Now I know!

Need Crochet supplies and Yarn? We highly recommend Lionbrand for quality yarn and ongoing yarn sales and discounts. Make sure to check out their free crochet patterns too.
«
»

Comments

  1. Paula says

    May 8, 2013 at 5:39 am

    It’s written in Turkish and can easily be translated by Google translation

  2. laura says

    May 8, 2013 at 2:59 pm

    It’s in Turkish. If you open it in firefox, it will translate for you.

  3. Cath T says

    May 9, 2013 at 7:11 am

    Google Translate says it’s Turkish, and gives you a translation, albeit a rough one. So pretty!

  4. Sandy Lewis says

    May 9, 2013 at 9:04 am

    It is written in Turkish. I used Google Translator and it worked perfectly.

  5. sandra smith says

    May 13, 2013 at 2:50 pm

    it is in turkish, i have google chrome and did a translate and got this, i hope it helps::::

    5 cm.çap?nda crochet flower motif used for the mercerized crochet thread and the number 2.5. 1st row: 63 chain started pulling. (More for larger sized chain is drawn flower motif) Level 2 Level: 3 chain partitions are made ??at intervals of two t?rabzanlardan. Level 3: in order for each bannisters, 1 single, 1 double, 2 triple, 1 double , 1 single all compartments filled with handrails made ??and finished. 4.Place: whether a properly rounded view of flower, motif applied to the back side of the fixing process with the help of a needle and thread. use rope or wool, taken into compartments filled with chain or amendments to be made ??in the number of rail can look different than flowers. Linking up at annemarieshaakblog.blogspot.com , andsewwecraft.com

  6. GJ says

    May 27, 2013 at 6:16 am

    At the top of the page there is an option to change to English-or a lot of other languages, for that matter.

  7. Nalan Ünal says

    October 3, 2016 at 2:24 am

    Hi,
    Thank you for sharing my work. I moved my old blog (tenreceremiz) to my new web site and added English language. Could you pls chance url with below.

    http://www.nalanunal.com.tr/tig-isi-cicek-yapimi/

    Loves

  8. Shellie Wilson says

    October 3, 2016 at 10:04 pm

    Thanks for letting us know the update!

  9. Martha Marks says

    October 26, 2021 at 11:48 pm

    YOu crochet so beautifully. I really enjoy just looking at your items.

Have you read?

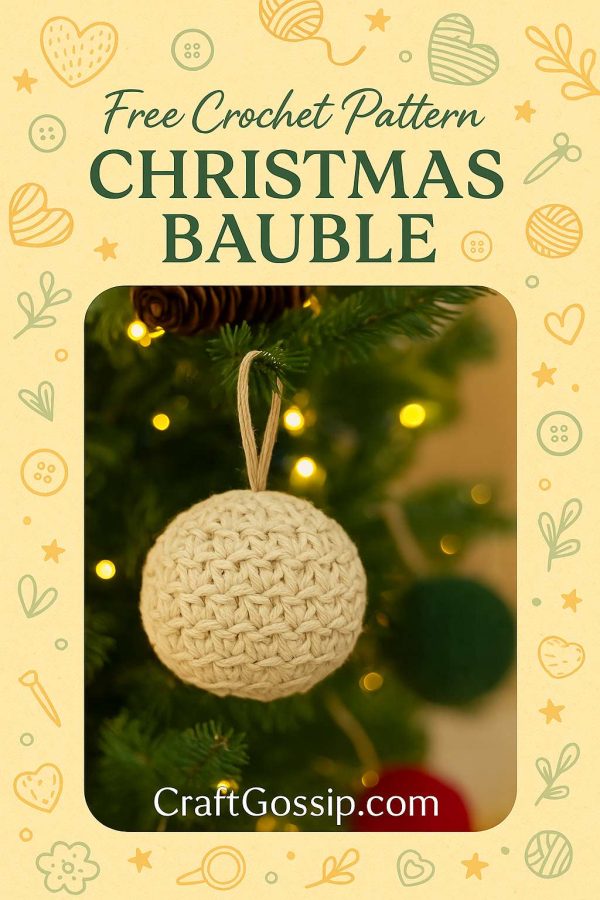
Cozy Crochet Bauble – A Scrap-Busting Holiday Ornament

Looking for a quick and festive little project to whip up during your favorite holiday movie? These plump and jolly baubles are the perfect way to use up those last bits of worsted weight yarn. You only need about 15 yards per ornament—and honestly, once you make one, you might find yourself reaching for your yarn scraps like a woman possessed. They work up in under 30 minutes, and you can customize them with ribbons, wooden beads, or even cinnamon sticks for that extra handmade charm.

They’re a hit as last-minute gifts, package toppers, or tree fillers. Pop a few in a bowl for a cheerful table display, or make a dozen to string across your mantel!

Materials You’ll Need:

  • Worsted weight yarn – around 15 yards per bauble 
  • A 5mm crochet hook (or the size that gives you a tight, tidy stitch) 
  • Tapestry needle 
  • Poly-fil or leftover yarn scraps for stuffing 
  • Optional extras: ribbon, twine, or wooden beads for hanging 

Techniques Used:

  • sc – single crochet 
  • sl st – slip stitch 
  • inc – increase (2 single crochets in one stitch) 
  • inv dec – invisible decrease (single crochet two stitches together using front loops only) 

You’ll be crocheting in a continuous spiral—so no need to join rounds unless you prefer it that way. Just use a stitch marker to keep track of where each round starts!

 Let’s Get Stitching!

Start:
Begin with a magic ring (or, if that’s not your jam, chain 2 and work into the second chain from the hook).

Round 1:
Place 6 single crochets into the center of the ring. Pull it closed tight. (6 sts)

Round 2:
Pop 2 single crochets into each stitch all the way around. (12 sts)

Round 3:
Work 1 single crochet into the first stitch, then 2 into the next. Repeat this pattern all the way around. (18 sts)

Round 4:
One single crochet into each of the next 2 stitches, then 2 into the third. Repeat the set across. (24 sts)

Round 5:
Single crochet into each of the next 3 stitches, then 2 into the fourth. Keep that rhythm going. (30 sts)

Rounds 6 to 10:
Just cruise along with one single crochet in every stitch around. These rounds give your bauble its lovely round shape. (30 sts per round)

Round 11:
Do 1 single crochet in each of the next 3 stitches, followed by an invisible decrease. Repeat that combo around. (24 sts)

Round 12:
Now go: single crochet in 2 stitches, then invisibly decrease the next two. Continue this pattern all the way. (18 sts)
 Tip: At this point, it’s a good idea to start adding your stuffing. Not too much yet—just enough to start shaping.

Round 13:
One single crochet in the next stitch, then an invisible decrease. Keep going. (12 sts)
 Add more stuffing now if needed—this is your last good chance before the top gets snug!

Round 14:
Work invisible decreases around the entire round. (6 sts)

Finishing Touches:

Snip your yarn, leaving a long enough tail to sew. Thread your needle and weave that tail through the last 6 stitches. Pull tight to cinch it shut like a drawstring pouch. Tuck the end inside the bauble and secure with a knot. Weave in any leftover yarn.

Add your hanging string, ribbon, or bead if you’d like—and just like that, your bauble’s ready to deck the halls!


More Articles

Afghans, Blankets & Throws amigurumi Baby Hat Baby Patterns Beanies Beginner Book Reviews Christmas CHRISTMAS Clothing Crochet Patterns Crochet Techniques & Ideas Easy Crochet Patterns Free Crochet Patterns Granny Squares Halloween Patterns Quick Scarfs shawls

RSS feed: More Articles More Articles

  • Free Christmas Berry Branch Table Runner Embroidery Pattern Review
  • Freebie Friday – Gothic Christmas Borders and Tags Printable Set
  • Free Felting Tutorial Friday: Nuno Felt Pillow
  • Free Christmas Tree Bauble Knitting Pattern: An Easy Ornament Knitted Flat
  • 8 No-Cook Keto Lunches for Days When the Stove Can Wait
  • Scandinavian Christmas Winter Lantern Review – A Beautiful Dollar Tree Craft with Cozy Nordic Charm
  • 15 Christmas Gifts You Can Sew in an Afternoon
  • Giant Coloring Pages for Kids and Adults: Free Printables, Posters and Classroom Ideas
  • Cozy Crochet Bauble – A Scrap-Busting Holiday Ornament
  • DIY Gift Tags Using Scrapbooking Supplies You Already Have

Pick Your Blog

  • Sewing
  • Knitting
  • Quilting
  • Crochet
  • Home & Garden
  • Recycled Crafts
  • Scrapbooking
  • Card Making
  • Polymer Clay
  • Cross-Stitch
  • Edible Crafts
  • Felting
  • Glass Art
  • Indie Crafts
  • Kids Crafts
  • Jewelry Making
  • Lesson Plans
  • Needlework
  • Bath & Body
  • Party Ideas
  • Candle Making
  • DIY Weddings
  • Not Craft
  • Free Craft Projects

Copyright © 2026 · CraftGossip | Start Here | Contact Us | Link to Us | Your Editors | Privacy and affiliate policy