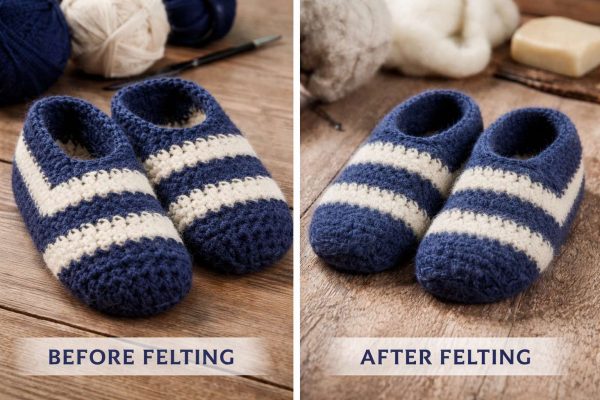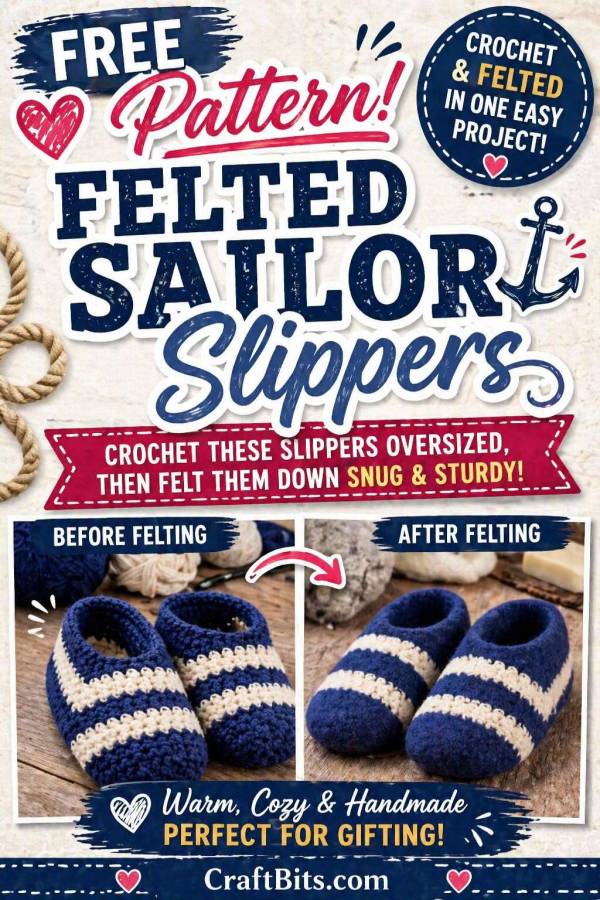
I’ve made a lot of slippers over the years, but these Felted Sailor Slippers are the ones that actually get worn until they’re threadbare. They’ve got that classic striped, almost nautical look before felting… and after a spin through the wash they turn into proper, sturdy, “don’t-feel-the-cold-tiles” slippers.
This is a Free Pattern – Felted Sailor Slippers, crocheted oversized on purpose, then felted down to fit snugly. The construction stays true to the original quick-make style, but the sizing has been adjusted so felting works in your favour instead of against you.
If you’ve got a bag of leftover wool and an hour to spare, you’re set.
What You’ll Need
Hook
6 mm crochet hook (larger than usual – this is intentional for felting)
Yarn
100% wool only (non-superwash – acrylic will not felt)
Bulky / Chunky weight (Category 5)
Two contrasting colours for that sailor stripe look
Good choices:
• Fisherman-style wool
• Classic wool blends clearly labelled “100% wool”
Gauge
Not critical. Loose stitches felt better than tight ones.
Finished Size (before felting)
Approx. 11–11.5 inches long
Felts down to roughly a women’s US 8–9
Stripe Notes (Worth Reading First)
- Carry unused yarn neatly up the inside edge
• Change colours on the slip stitch join for cleaner stripes
• Bold, high-contrast colours show off best after felting
Stripe rhythm suggestion:
2 rounds Colour A, 2 rounds Colour B
Sizing Note – Please Read Before You Start
These slippers are designed to look too big at first — that’s not a mistake, it’s the magic of felting.
You do not need a separate pattern for different sizes. This is a felted slipper, which means the final fit is created during the felting process, not while you’re crocheting.
If your slippers feel roomy, floppy, or even slightly ridiculous before felting, you’re right on track.
Felting will:
• Shrink the slippers evenly
• Firm up the stitches
• Shape the toe and sole
• Create a snug, custom fit
One pattern comfortably covers multiple sizes with very small adjustments.
How to fine-tune the fit:
• Smaller feet ? Felt a little longer and shape firmly while damp
• Average women’s sizes (7–9) ? Follow the pattern as written
• Larger feet or men’s sizes ? Add 1–2 extra rounds before shaping, or use a slightly larger hook
Because different wools felt at different speeds, this method is actually more reliable than strict stitch counts. When in doubt, stop the wash, check the size, and continue felting in short bursts until the fit feels right.
If they look too big before felting — you’ve done it correctly.
Free Pattern – Felted Sailor Slippers
Toe Section
Chain 2 to begin
Round 1 (Colour A)
10 dc into first chain. Join.
(10 sts)
Round 2 (Colour A)
Ch 2, 2 dc in each stitch around. Join.
(20 sts)
Round 3 (Colour B)
Ch 2, dc in next 3 sts, 2 dc in next st repeat around. Join.
(25 sts)
Foot Body (Oversized for Felting)
Rounds 4–13
Dc in each stitch around.
Change colours every 2 rounds.
Join each round.
These extra rounds are what give you enough length to felt down without ending up with tiny slippers.
Slipper Shaping
Row 14 (Colour A)
Ch 2, dc in next 20 stitches. Turn.
(20 sts)
Rows 15–18
Dc evenly across each row, turning at the end.
Change colour every row if you want thinner stripes.
Toe Decreases
Row 19 (Colour B)
Ch 2, dc 6, dc2tog 4 times, dc 6. Turn.
(16 sts)
Row 20 (Colour A)
Ch 2, dc 4, dc2tog 4 times, dc 4. Turn.
(12 sts)
Row 21
Turn and slip stitch to first stitch of previous row.
Opening Edge
Round 22
Ch 2, work 2 dc into each row-end down the side (7 times),
dc across toe (12 sts),
2 dc into each row-end up the other side (7 times).
Join.
(Approx. 40 sts – exact number isn’t critical)
Round 23
Ch 1, skip 2 sts, 5 dc in next st, skip 2 sts, sl st in next st repeat around.
Join.
Fasten off, leaving a long tail.
Assembly
Fold slipper with right sides together.
Sew heel seam securely.
Weave in ends lightly (don’t overwork – felting will lock everything in).
At this stage the slipper will look far too big and floppy. Perfect.
Felting the Slippers
- Place slippers inside a pillowcase or laundry bag
- Wash on hot with regular detergent
- Add towels or jeans for agitation
- Check every 5–7 minutes
Stop felting when:
• Stitches blur
• Fabric feels thick and dense
• Slipper is close to foot size
Shape while damp:
• Pull toe forward
• Flatten the sole
• Smooth the opening
Air dry fully.
Fit & Size Tweaks
- Wool usually shrinks 20–30%
• If slippers feel loose once dry, re-felt briefly
• For wider feet, use a 6.5 mm hook
• For men’s sizes, add 2 extra rounds before Row 14
These Felted Sailor Slippers end up warm, sturdy, and genuinely wearable – the kind you pad around the house in all winter without thinking about it. Once you’ve made one pair, you’ll probably start eyeing off your wool stash and planning the next colour combo before the first pair is even dry.
Prefer a visual guide? Check out this online video tutorial
https://youtu.be/q3jlftoOHWc