This cheerful red, white, and blue crochet pinwheel is one of those quick patriotic projects that instantly feels festive without requiring a huge pile of supplies or three uninterrupted hours at the craft table. It is bright, playful, and just the right amount of handmade charm for summer decorating, 4th of July parties, parade accessories, wreath embellishments, and children’s hats.
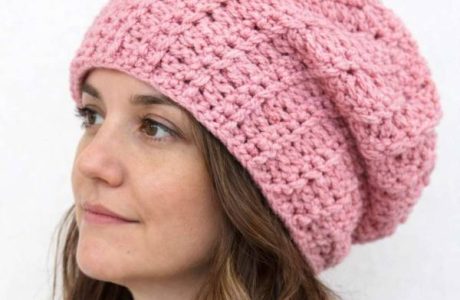
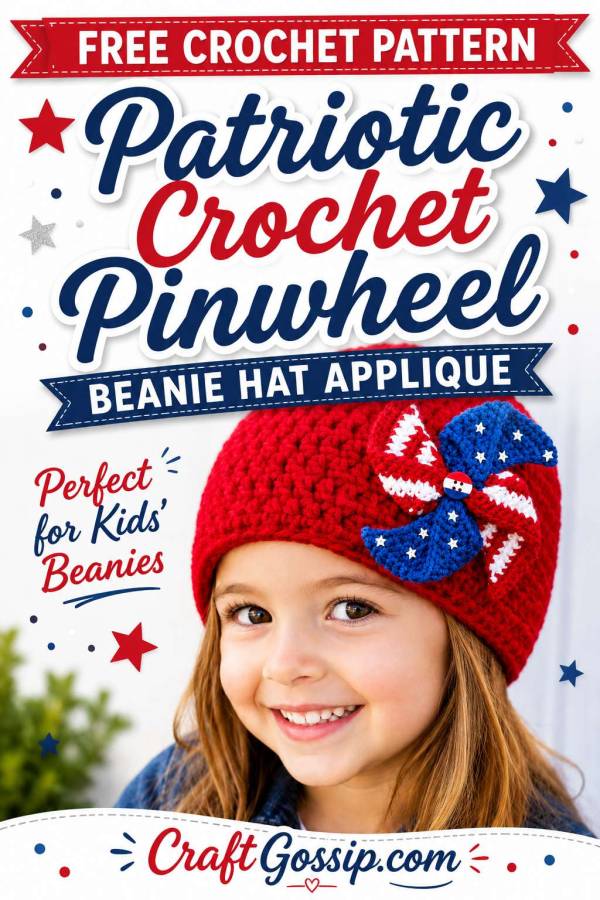
What I love most about this little crochet pinwheel is how versatile it is. You can glue it to a wooden dowel or craft stick to make a decorative pinwheel wand for table centrepieces, porch pots, party displays, or parade photos. Or, if you want something a little more wearable, stitch or glue it onto a solid red beanie and turn it into a bold patriotic crochet applique. It would be adorable for toddler photos, handmade market stock, family BBQ outfits, or a quick red, white, and blue accessory when you want something festive but not over the top.
This is also a brilliant scrap yarn crochet project. You only need small amounts of red, white, and blue yarn, so it is perfect for using up those leftover balls in the basket — the ones too small for a proper project but apparently too precious to throw away. Cotton yarn will give the pinwheel a slightly firmer finish, especially if you are using it on a stick, while acrylic yarn works nicely for a softer applique on a hat. A good basic crochet hook, yarn needle, hot glue gun, and a handful of round patriotic buttons are really all you need, and most of those supplies are easy to find through craft shops, Amazon, Mary Maxim, or even your own button tin if you are lucky.
The centre is finished with a simple round button, which gives the pinwheel a clean, polished look while still keeping it sweet and handmade. It covers the stitched centre neatly, adds a little extra colour, and makes the whole piece feel more finished without making the design too fussy.
Whether you make one as a beanie applique, a party pick, a wreath accent, or a cheerful handmade decoration for a summer celebration, this patriotic crochet pinwheel is a lovely little make that works up quickly and brings plenty of red, white, and blue charm.
Finished Size
Using worsted weight yarn and a 4.5 mm crochet hook, the finished pinwheel measures approximately 6–7 inches across.
For a smaller hat applique, use DK yarn or crochet cotton with a smaller hook.
Skill Level
Easy / Confident Beginner
Materials
- Small amount of red worsted weight yarn
- Small amount of white worsted weight yarn
- Small amount of blue worsted weight yarn
- 4.5 mm crochet hook
- Yarn needle
- Scissors
- One round white button for the centre or these fun striped buttons.
- Sewing needle and thread
- Optional: small white embellishments for the blue sections
- Wooden dowel, skewer, or craft stick if making a pinwheel wand
- Hot glue gun or strong craft glue if attaching to a stick
- Beanie hat if using as a hat applique
Cotton yarn will give the pinwheel a slightly firmer finish, which is handy if you are using it on a stick. Acrylic yarn works nicely for a soft beanie applique.
Abbreviations
This pattern uses US crochet terms.
- ch – chain
- sc – single crochet
- sl st – slip stitch
- st / sts – stitch / stitches
Pattern Notes
The pinwheel is made from four separate crochet blades.
You will make:
- 2 solid blue blades
- 2 red and white striped blades
- 1 small centre circle
The blades are sewn around the centre circle and shaped into a curved pinwheel before the white round button is added.
Ch 1 at the beginning of a row does not count as a stitch.
Accuracy Check
Each blade begins with 6 stitches and increases evenly to 16 stitches. The shaping is the same for all four blades, so the pinwheel balances properly when assembled. The striped blades use the same stitch count as the blue blades, which keeps the finished piece even.
Centre Circle
Using blue yarn:
Round 1: Ch 4, join with a sl st to form a ring. Ch 1, work 8 sc into the ring. Join with sl st to first sc.
Round 2: Ch 1, work 2 sc in each st around. Join with sl st to first sc.
Fasten off, leaving a long tail for sewing.
You should have 16 sc.
Blue Blade
Make 2.
Using blue yarn:
Row 1: Ch 7. Sc in 2nd ch from hook and in each ch across. Turn.
You should have 6 sc.
Row 2: Ch 1, 2 sc in first st, sc in each st across to last st, 2 sc in last st. Turn.
You should have 8 sc.
Row 3: Ch 1, sc in each st across. Turn.
You should have 8 sc.
Row 4: Ch 1, 2 sc in first st, sc in each st across to last st, 2 sc in last st. Turn.
You should have 10 sc.
Row 5: Ch 1, sc in each st across. Turn.
You should have 10 sc.
Row 6: Ch 1, 2 sc in first st, sc in each st across to last st, 2 sc in last st. Turn.
You should have 12 sc.
Row 7: Ch 1, sc in each st across. Turn.
You should have 12 sc.
Row 8: Ch 1, 2 sc in first st, sc in each st across to last st, 2 sc in last st. Turn.
You should have 14 sc.
Row 9: Ch 1, sc in each st across. Turn.
You should have 14 sc.
Row 10: Ch 1, 2 sc in first st, sc in each st across to last st, 2 sc in last st. Turn.
You should have 16 sc.
Row 11: Ch 1, sc in each st across.
Fasten off, leaving a long tail for sewing.
Red and White Striped Blade
Make 2.
Begin with red yarn.
Row 1: Ch 7. Sc in 2nd ch from hook and in each ch across. Turn.
You should have 6 sc.
Row 2: Ch 1, 2 sc in first st, sc in each st across to last st, 2 sc in last st. Change to white. Turn.
You should have 8 sc.
Row 3: Ch 1, sc in each st across. Turn.
You should have 8 sc.
Row 4: Ch 1, 2 sc in first st, sc in each st across to last st, 2 sc in last st. Change to red. Turn.
You should have 10 sc.
Row 5: Ch 1, sc in each st across. Turn.
You should have 10 sc.
Row 6: Ch 1, 2 sc in first st, sc in each st across to last st, 2 sc in last st. Change to white. Turn.
You should have 12 sc.
Row 7: Ch 1, sc in each st across. Turn.
You should have 12 sc.
Row 8: Ch 1, 2 sc in first st, sc in each st across to last st, 2 sc in last st. Change to red. Turn.
You should have 14 sc.
Row 9: Ch 1, sc in each st across. Turn.
You should have 14 sc.
Row 10: Ch 1, 2 sc in first st, sc in each st across to last st, 2 sc in last st. Turn.
You should have 16 sc.
Row 11: Ch 1, sc in each st across.
Fasten off, leaving a long tail for sewing.
Optional Border
For a neater edge, work a simple sc border around each blade before assembling.
Join matching yarn to one corner of the blade. Work sc evenly around the outside edge, placing 2 sc into each outer corner to help the blade sit smoothly. Join with sl st and fasten off.
This step is optional, but it gives the pinwheel a more finished look, especially if it will be used on a beanie or displayed on a stick.
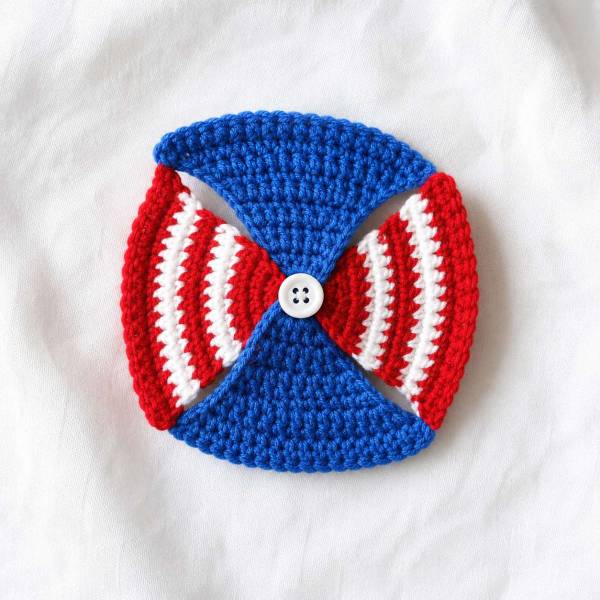
Assembling the Crochet Pinwheel
Lay the centre circle flat with the right side facing up.
Arrange the four blades around the circle in this order:
- Blue blade
- Red and white striped blade
- Blue blade
- Red and white striped blade
Place the narrow end of each blade slightly underneath the centre circle.
Using the yarn tails, sew each blade securely to the back of the centre circle.
To create the pinwheel shape, gently curve the outer corner of each blade inward toward the centre. Tack each curved corner down with sewing thread or yarn. Work in the same direction around the pinwheel so the swirl looks even.
Once the blades are secure, sew a round white button to the centre of the pinwheel.
To Attach The Pinwheel To A Stick
This makes a sweet patriotic party pick, parade wand, wreath accent, vase decoration, or table centrepiece.
- Turn the crochet pinwheel over so the back is facing up.
- Place the top of a wooden dowel, skewer, or craft stick against the back centre of the pinwheel.
- Add a generous line of hot glue or strong craft glue over the stick and onto the back of the crochet centre.
- For extra strength, glue a small felt circle over the back of the centre, sandwiching the stick between the crochet piece and felt.
- Allow the glue to dry completely before handling.
For outdoor use, a bamboo skewer or wooden dowel works well. If children will be holding it, trim or cover any sharp end first.
To Attach The Pinwheel To A Beanie Hat
This makes a cute patriotic hat embellishment for summer events, photo props, market stalls, or handmade gifts.
- Decide where you want the pinwheel to sit on the beanie. It looks best slightly off-centre.
- Pin the crochet pinwheel in place.
- Use matching sewing thread or yarn to stitch around the back centre and a few points of the blades.
- Do not stitch every edge flat. Leaving some of the blade edges loose gives the applique more movement and dimension.
- Knot securely on the inside of the hat and weave in any yarn ends.
For a removable version, sew the pinwheel onto a felt circle first, then attach a brooch back or large safety pin to the felt backing. This lets you move the applique from a beanie to a bag, scarf, or jacket.
Finishing Ideas
You can keep the pinwheel simple with just the white button centre, or add small white decorative details to the blue blades.
Try using:
- tiny sewn-on white accents
- white embroidery stitches
- small felt cut-outs
- white beads
- simple French knots
Keep embellishments lightweight if attaching the pinwheel to a beanie, so it does not pull the hat out of shape.
Helpful Tips
If the pinwheel feels floppy, lightly steam block the blades before assembly. Do not press them flat; just encourage the curved shape with your fingers.
For a firmer pinwheel on a stick, use cotton yarn or spray the finished piece lightly with fabric stiffener.
If making this for a child’s hat, sew everything securely instead of relying on glue.
If using hot glue, keep the glue mostly on the back of the centre so it does not show through the front stitches.
Suggested Uses
This crochet patriotic pinwheel can be used as:
- a 4th of July crochet decoration
- a red, white, and blue beanie applique
- a patriotic parade wand
- a wreath embellishment
- a handmade party favour
- a crochet brooch
- a table centrepiece pick
- a gift topper
- a bag or tote embellishment
It is a lovely little scrap yarn project and a good one to batch-make if you are decorating for summer markets, patriotic holidays, or backyard celebrations.